Setup instructions
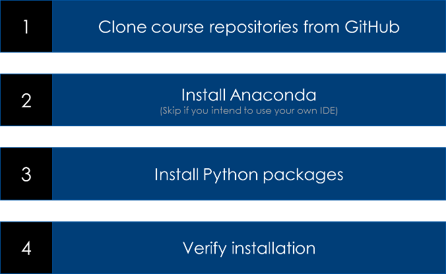
1. Clone project repository (GitHub)
This course is hands-on, allowing you to explore and work directly with the code. The sample code is provided in Jupyter notebooks, available in a public GitHub repository. The code is kept intentionally simple, ensuring that programmers of all skill levels can easily follow along.
Code may change over time. As a result the code shown in video may be slightly different than the code in respository.
You need to have git client installed on your machine.
- Create a new folder as the [root-folder-for-course-repository] e.g., gen-ai-app-dev-course
- Review the repository gen-ai-app-dev
- Clone the code repository : gen-ai-app-dev
git clone https://github.com/acloudfan/gen-ai-app-dev.git
- Clone the template repository : gen-ai-app-dev-template
git clone https://github.com/acloudfan/gen-ai-app-dev-template.git
You will use the template repository for creating your own notebooks for exercises, experimentation and projects. More on this in the next section.
2. Install Anaconda (local Jupyter lab)
You will need to setup your local machine for Jupyter notebooks. If you are new to Jupyter notebooks (and lab), I suggest that you watch a couple of videos on YouTube before proceeding.
There are multiple ways to setup Jupyter Lab on a machine. If you have a preferred way or installation, please feel free to use it. It should be OK as long as Python version is compatible with the code provided in the project repository.
If you plan to use a different Jupyter Lab setup, you do not need to install Anaconda. But you MUST follow the rest of the instructions; adjust the instructions for your setup.
You may use your preferred Jupyter Lab environment as long as it is setup for Python version 3.12.4
(Recommended) Install Anaconda
If you would prefer to use your own preferred JupyterLab setup please skip this step.
-
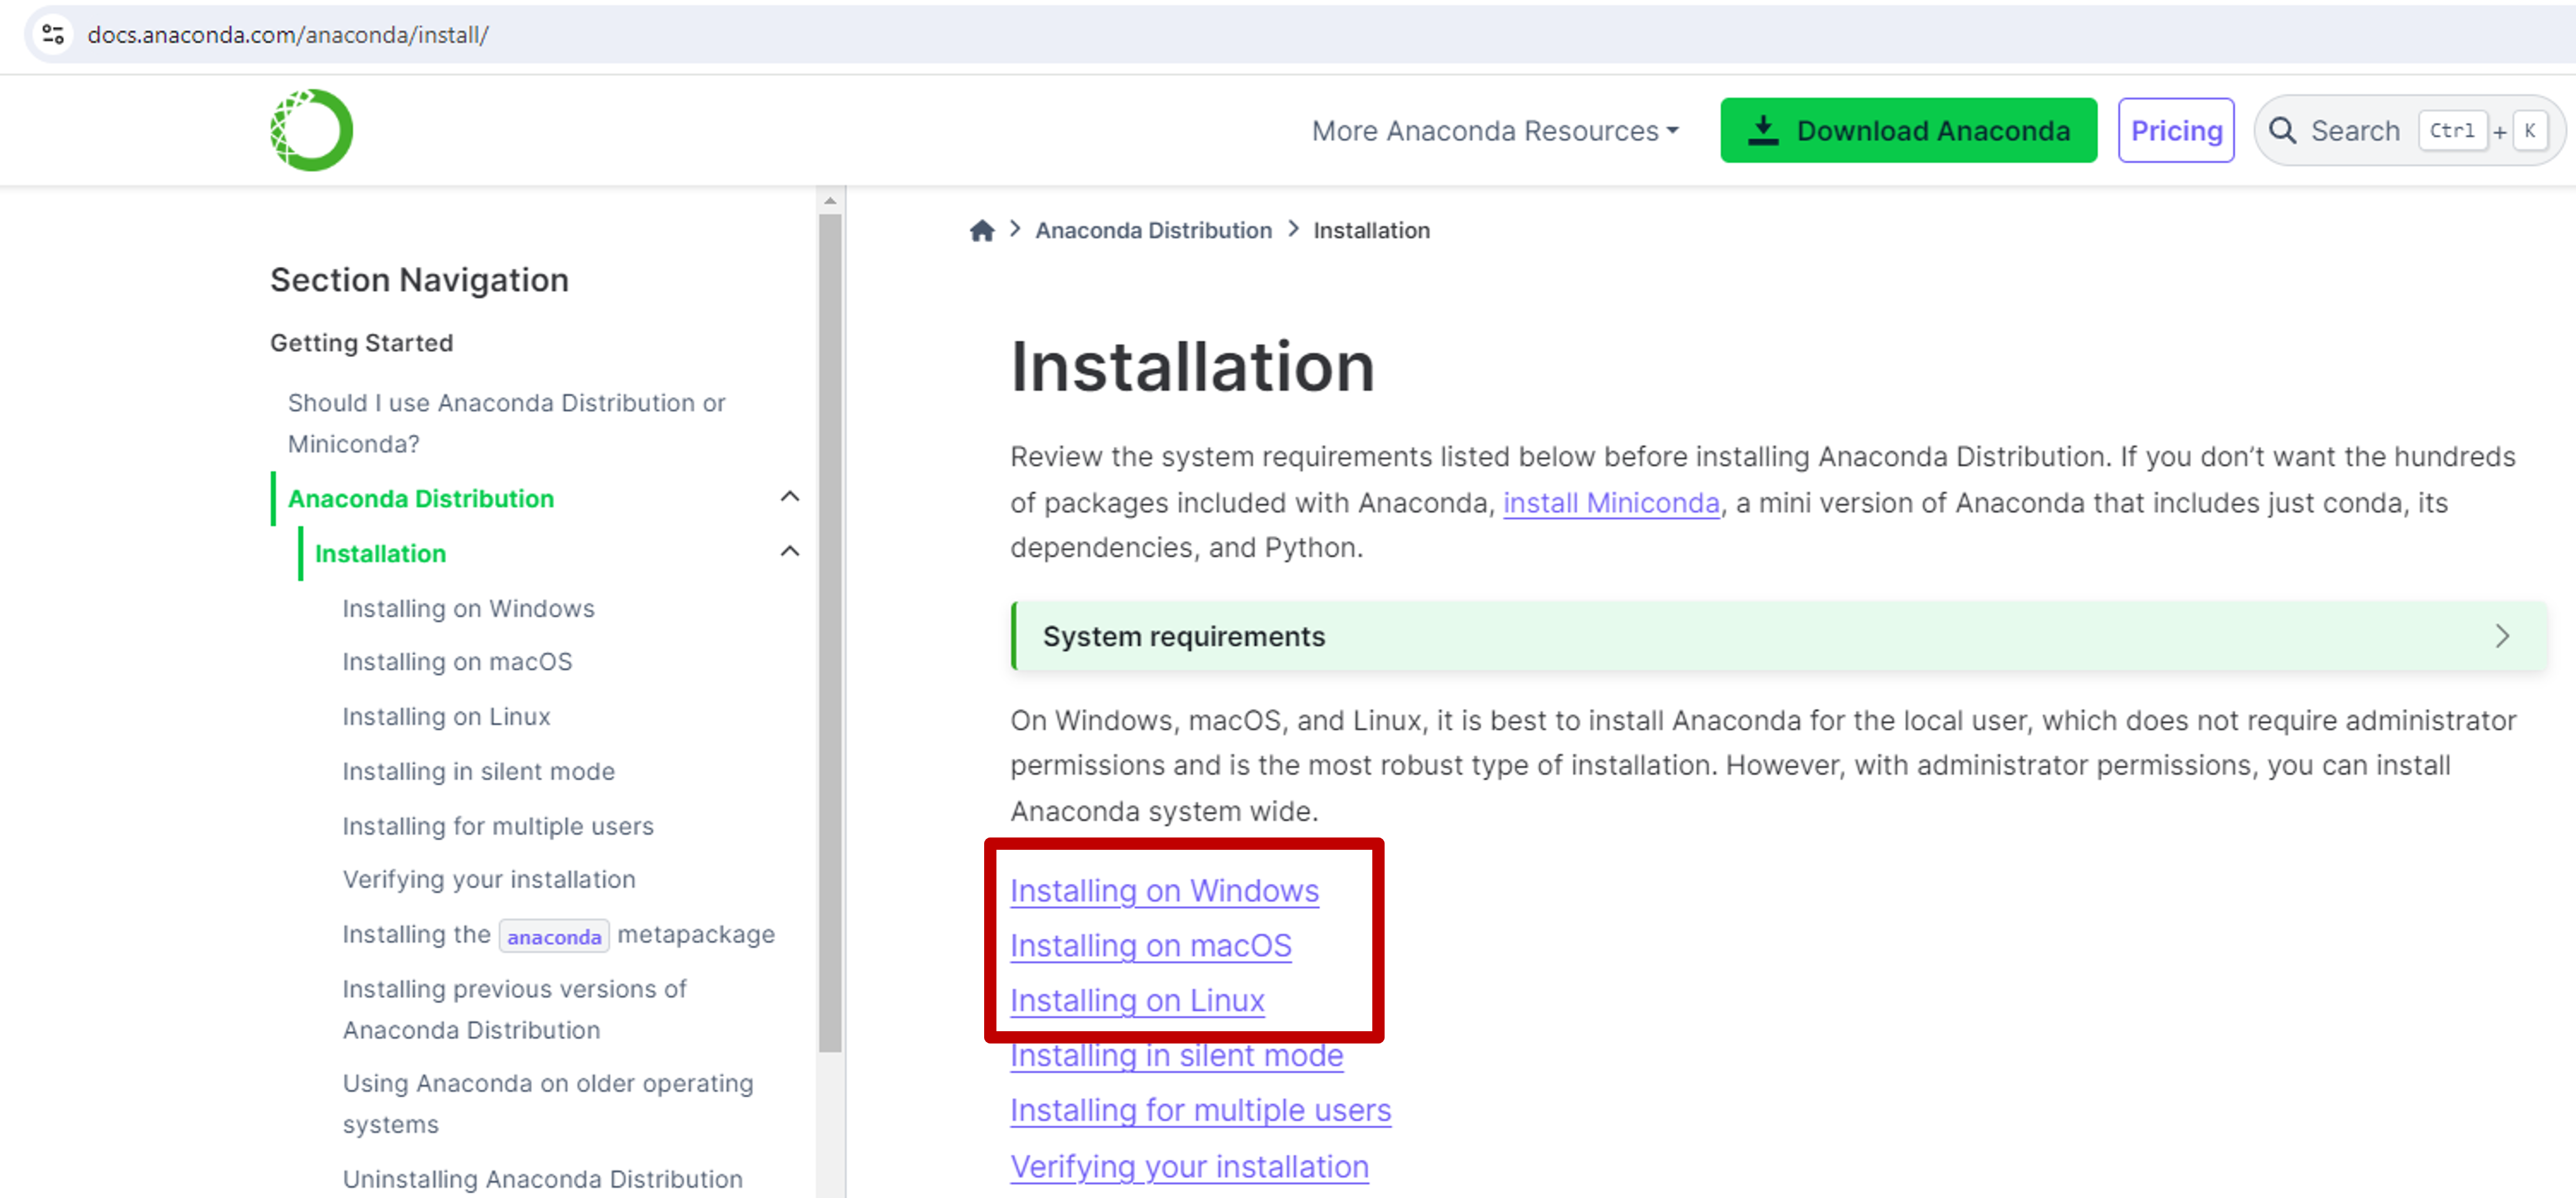
Checkout the installation instructions for your machine (Windows/macOS/Linux)
-
Follow the instructions for your specific platform to install the
Create virtual environment
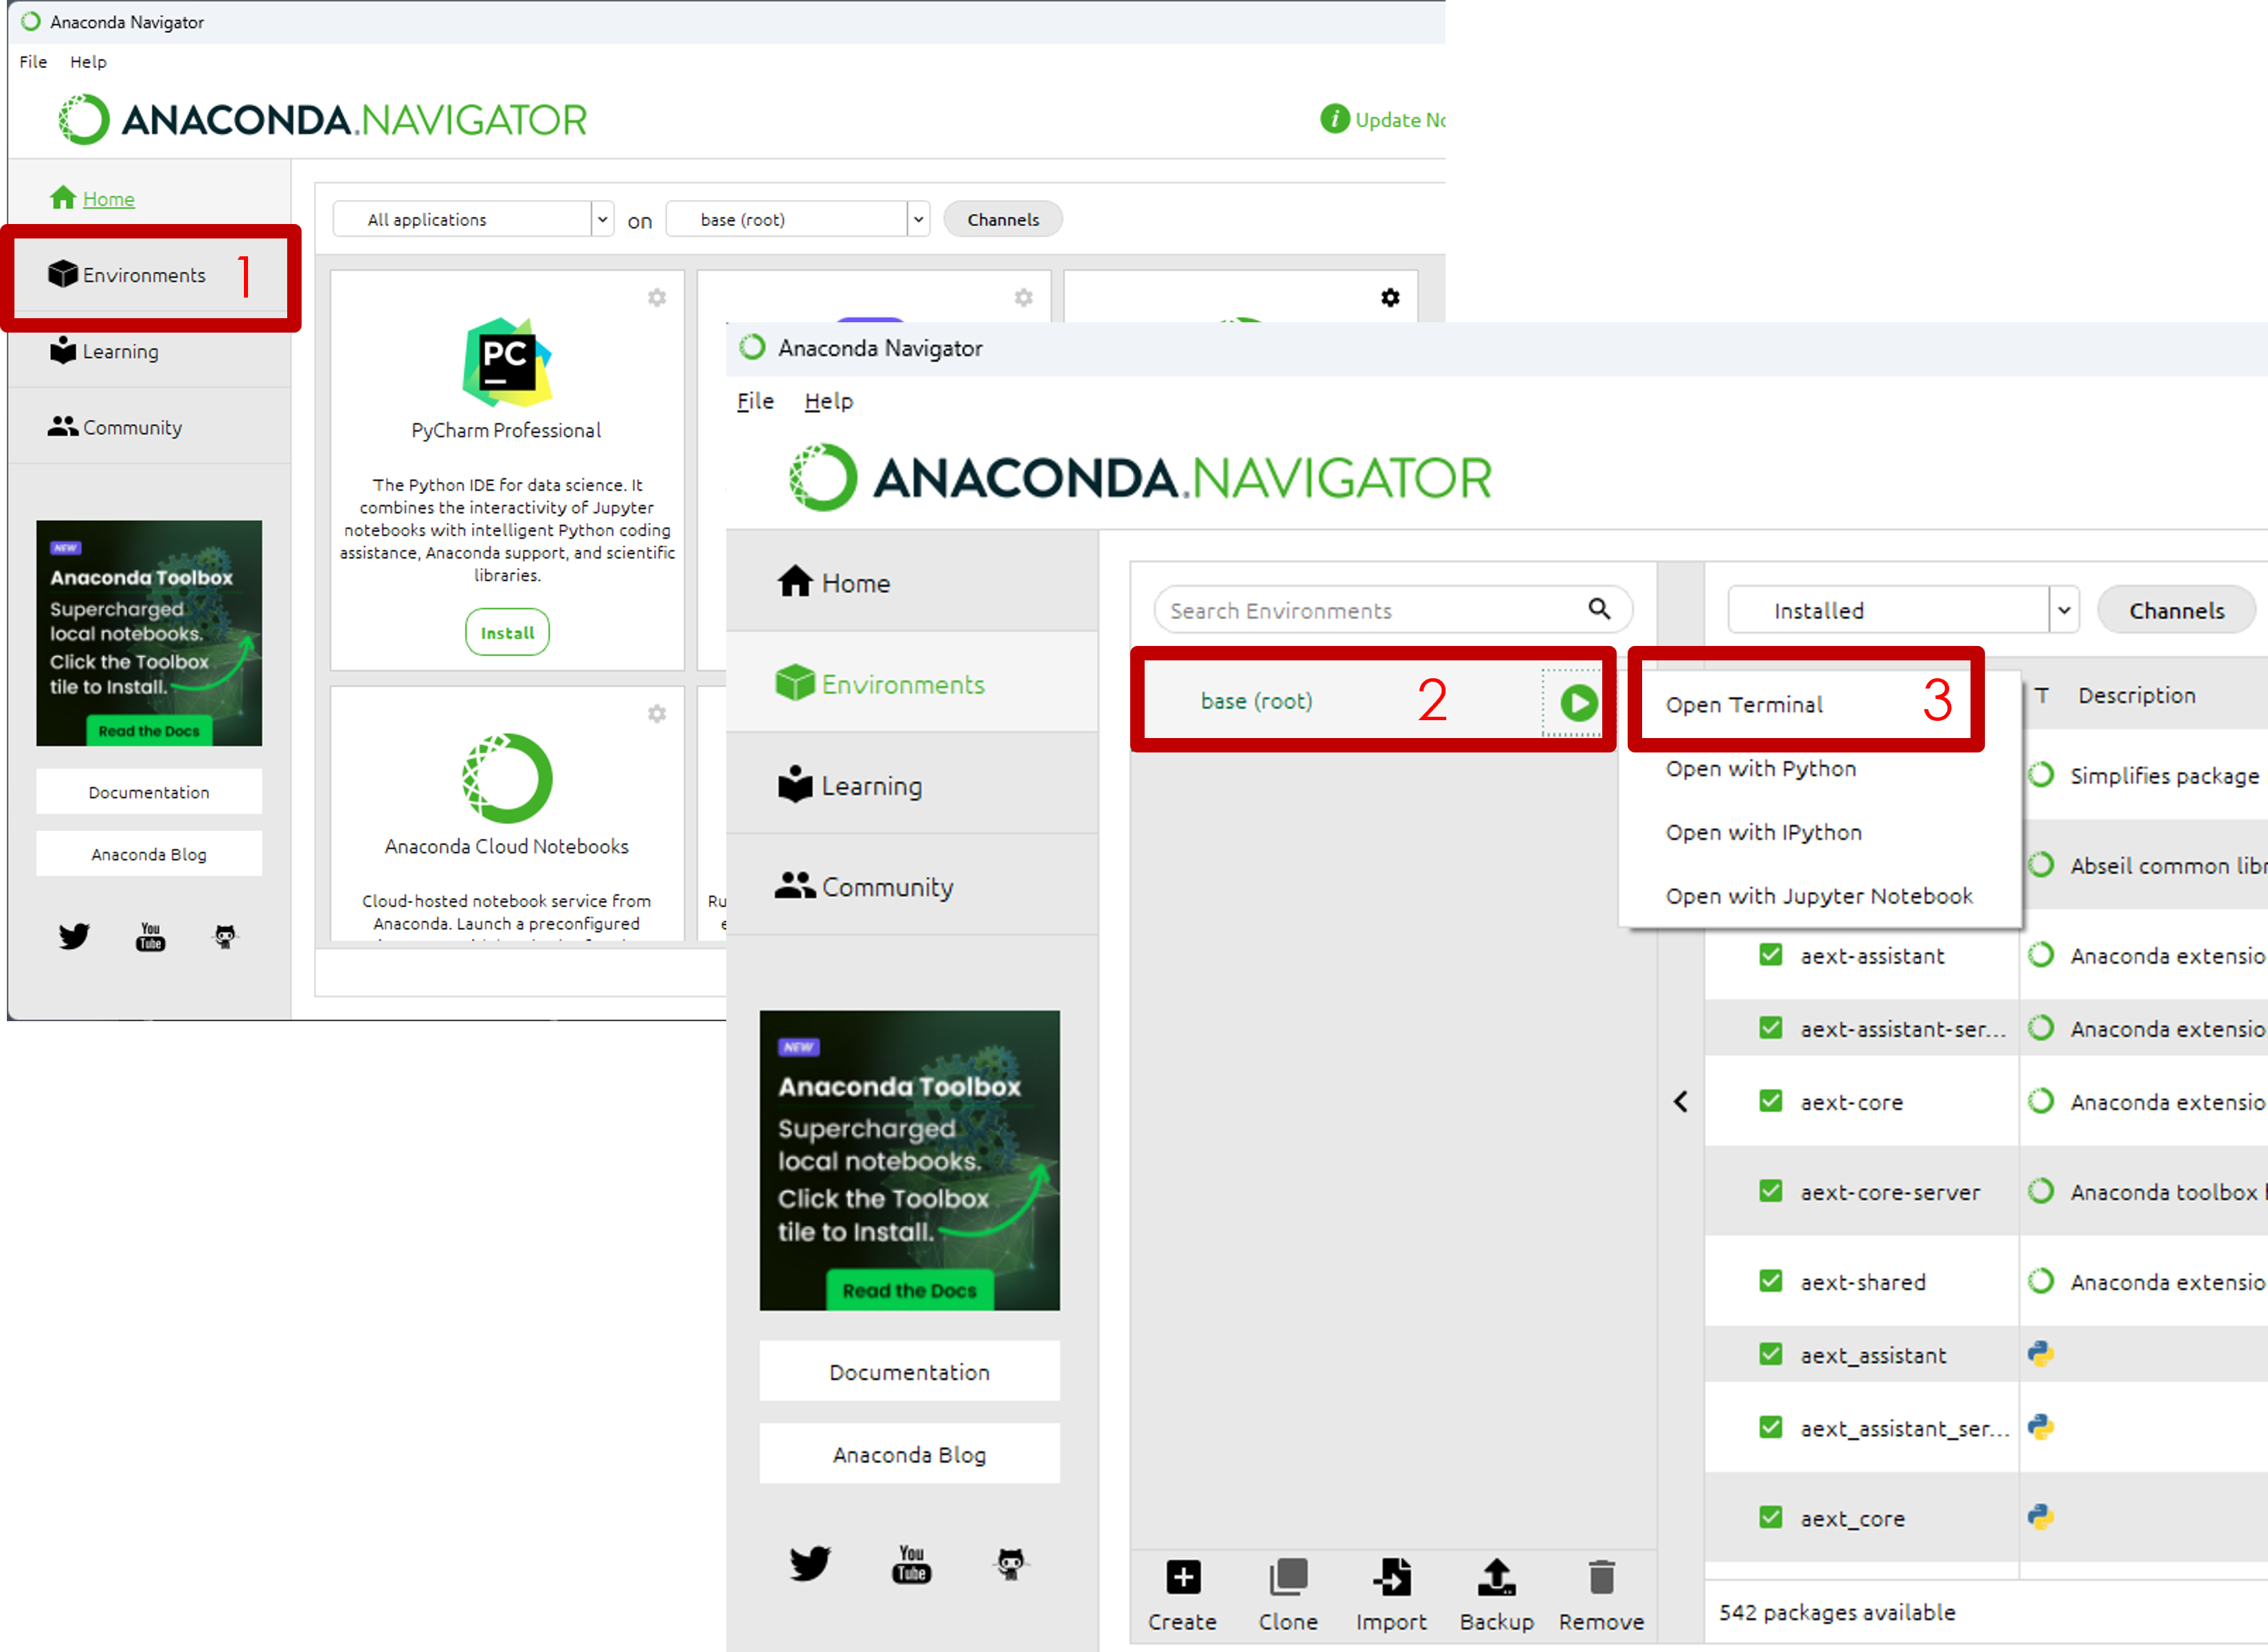
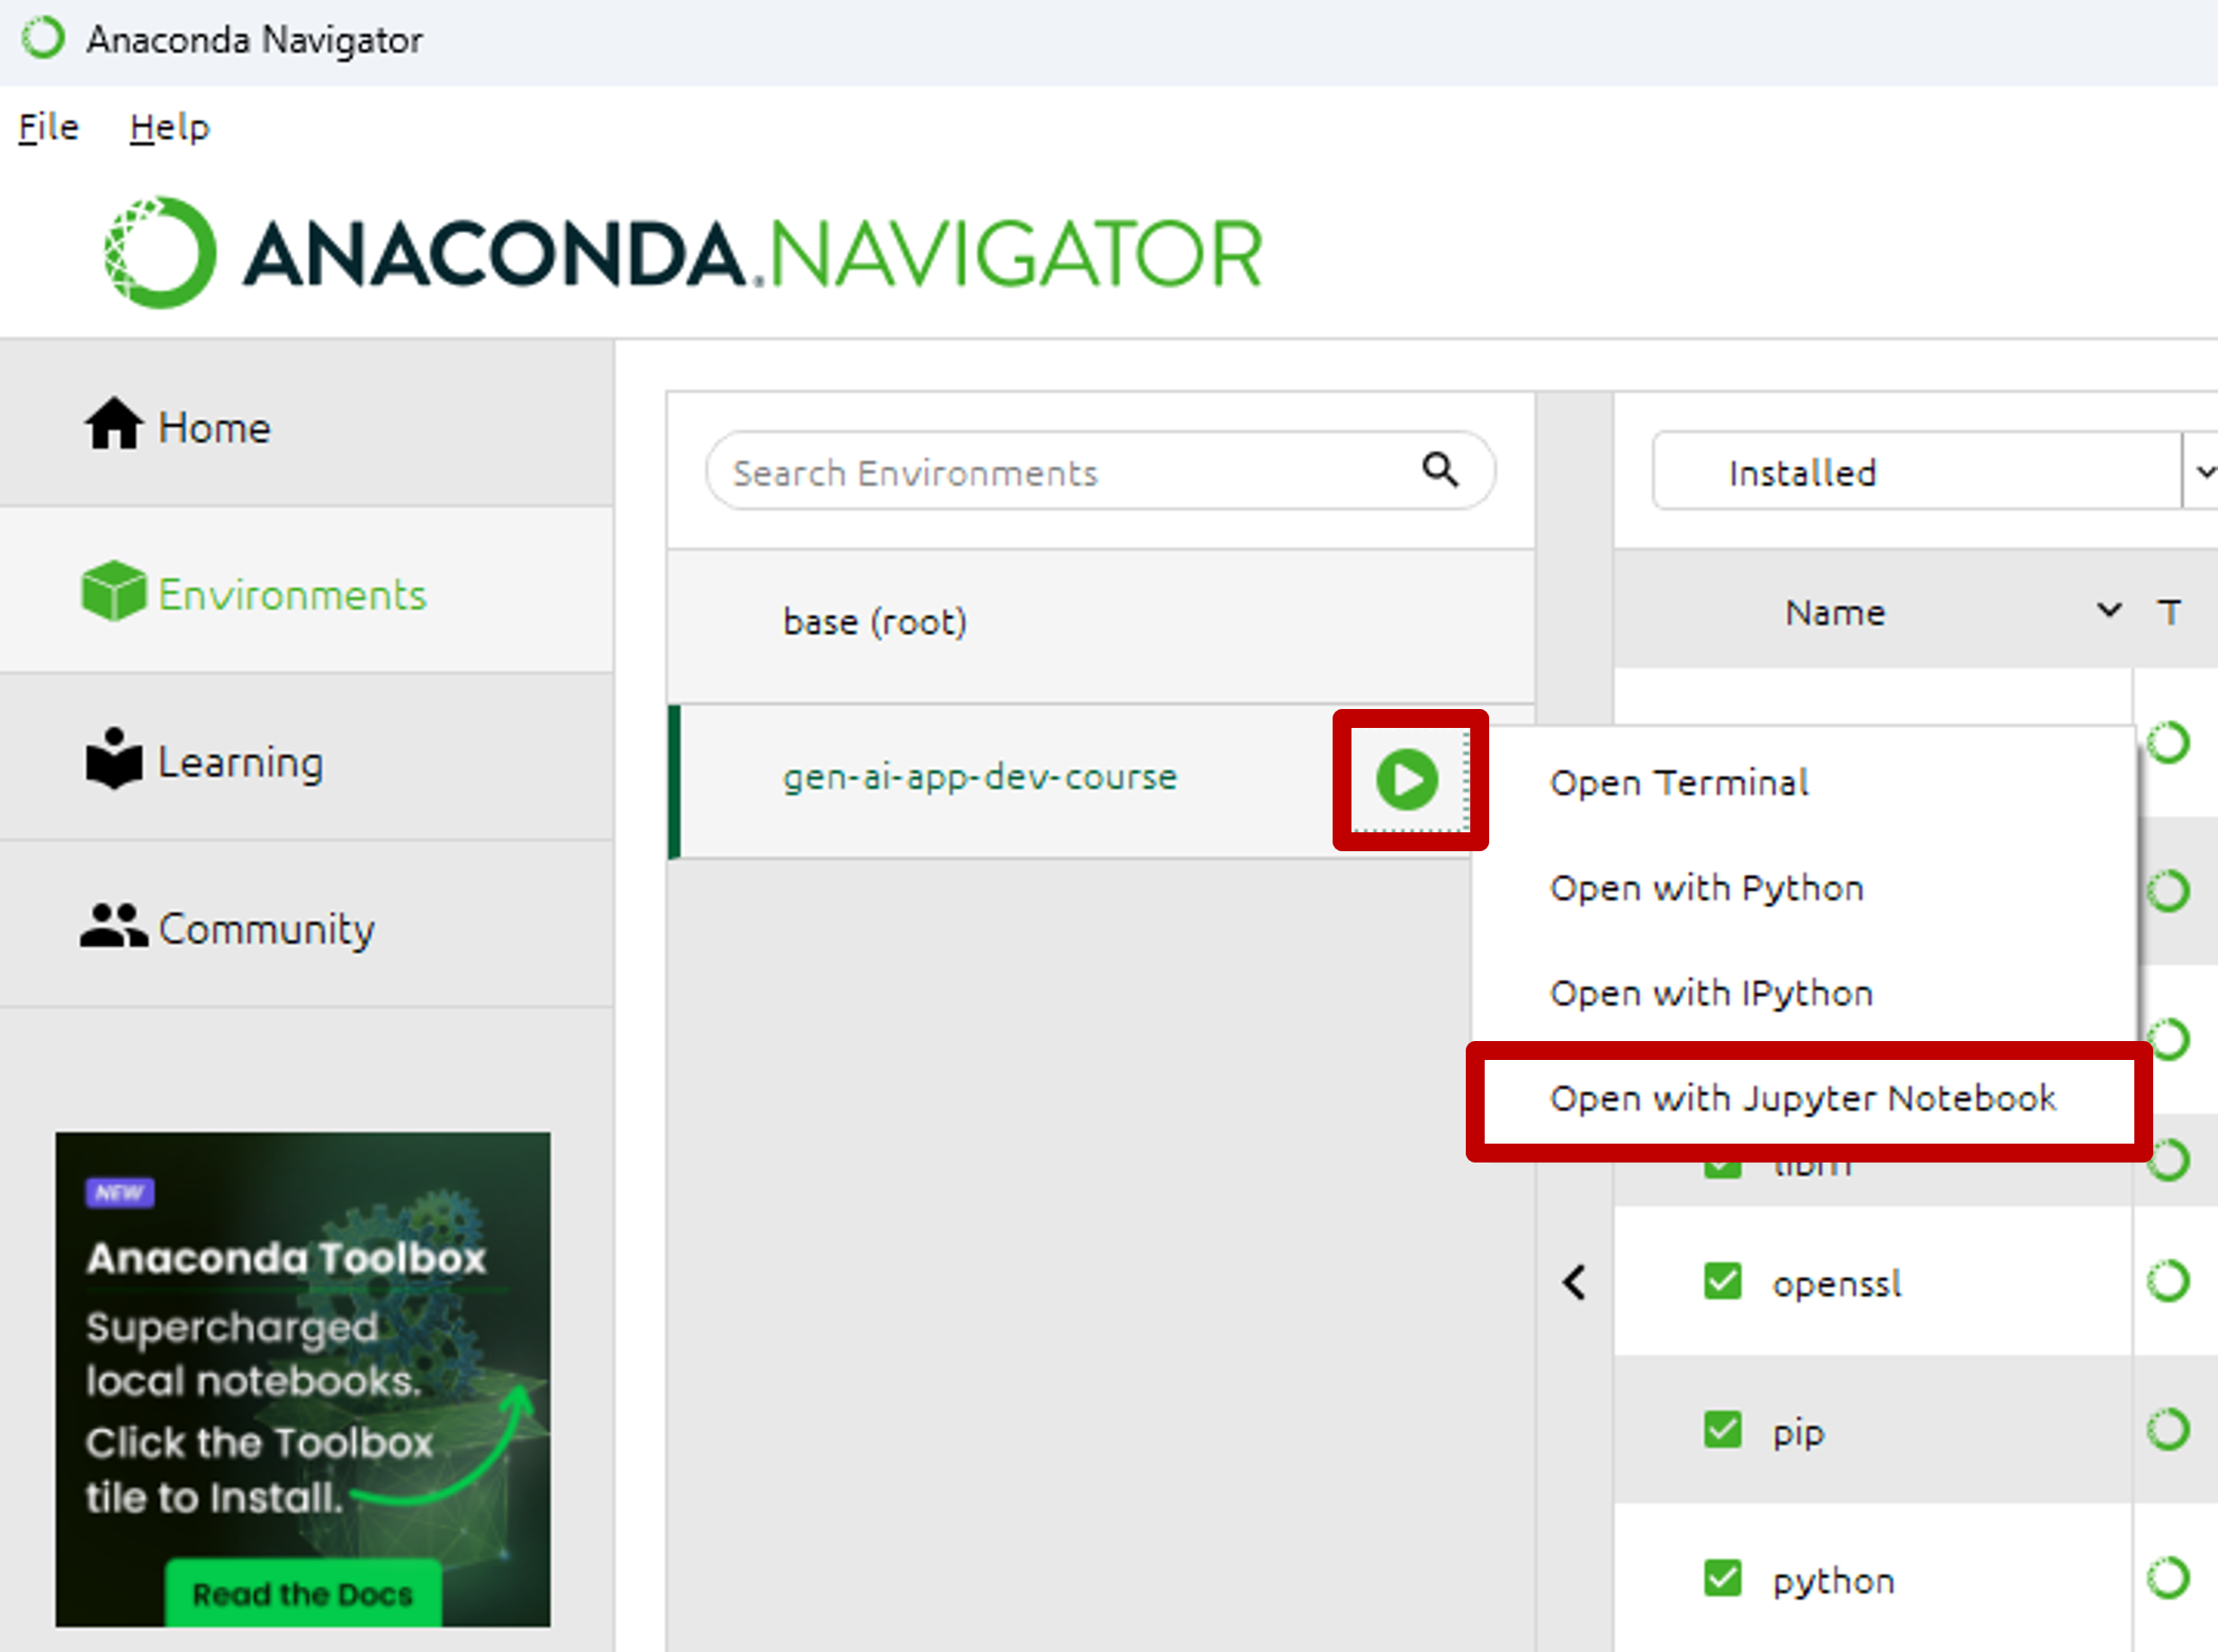
Launch Anaconda Navigator. Refer to the illustration below and follow the steps.
- Open the Anaconda natigator & Select the Environments in left panel
- Click on the green triangle on any existing environment
- Select open terminal
- Run the command in the terminal to create the virtual environment
conda config --append channels conda-forge

conda create  --yes --name gen-ai-app-dev-course  python=3.12.4
- Close the terminal window
Environment creation will take a few minutes to complete. Once it is successfuly created, you will see it in the list of environments in the Anaconda navigator
3.Install Python packages
To provide a consistent experience from this course, almost all Python packages used in this course will be provided in the requirements.txt provided in the repository. In case you are using your own preferred Jupyter Lab setup, please install the packages using the provided requirements.txt file.
-
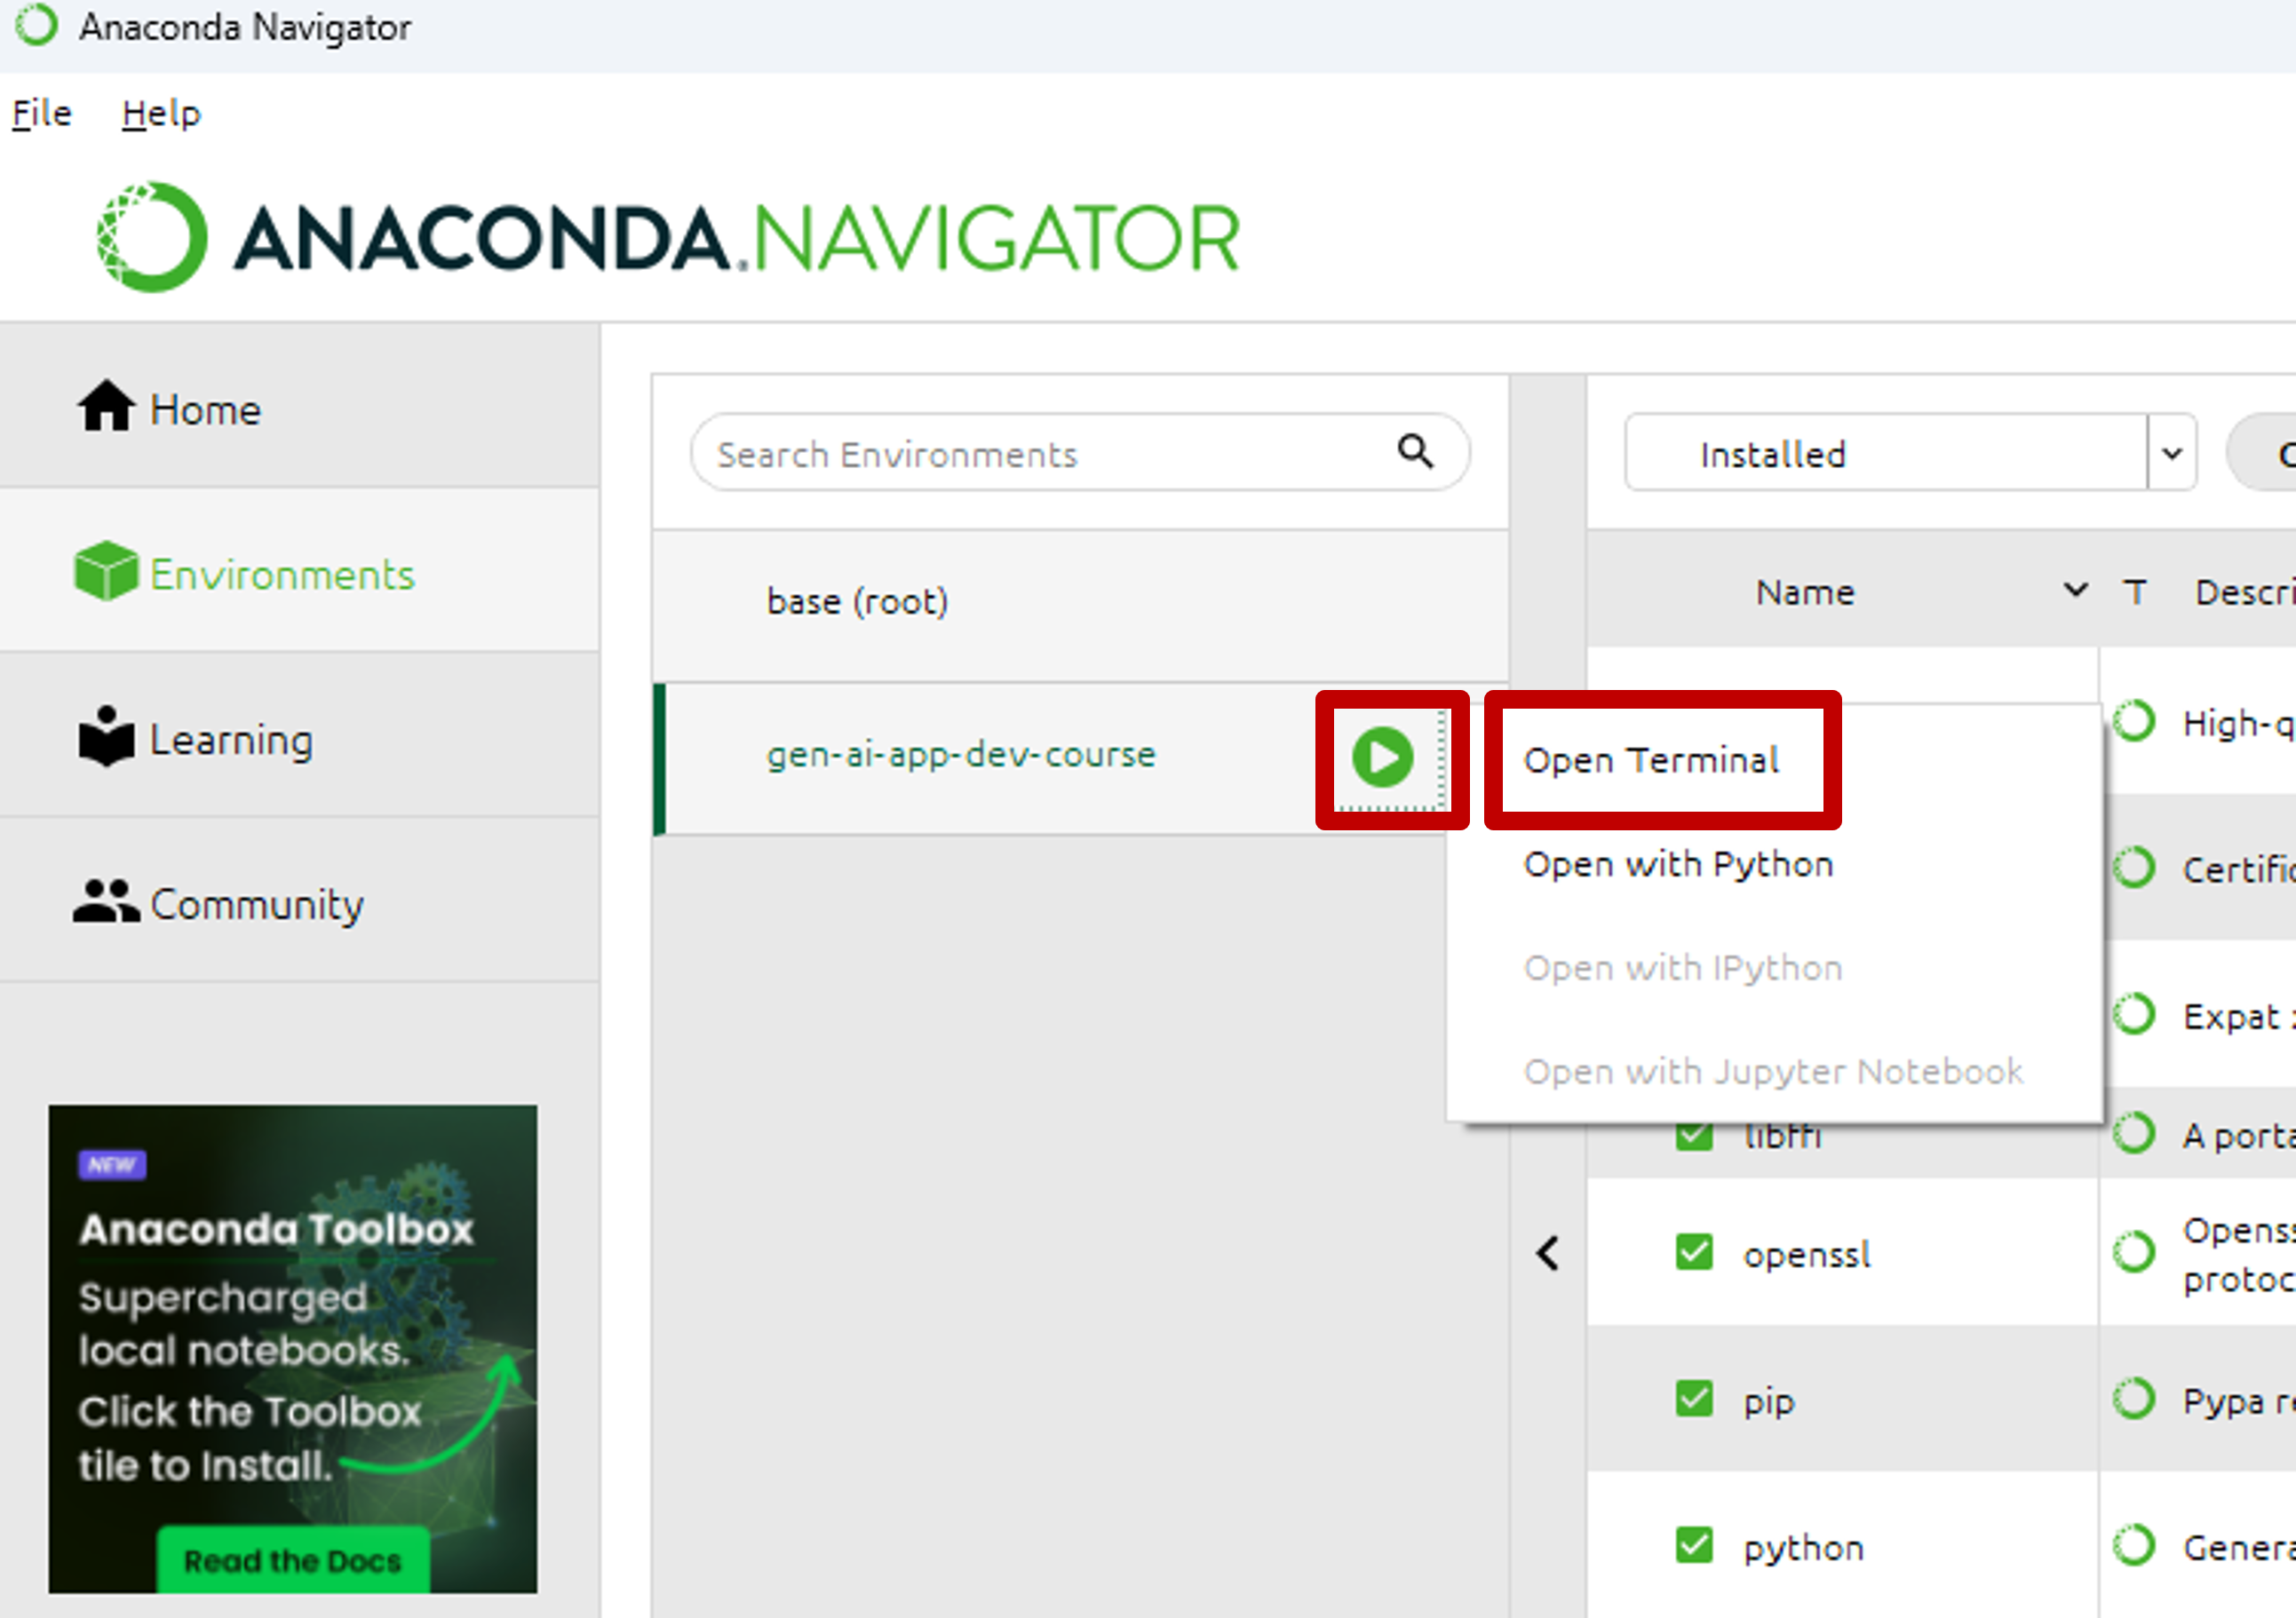
Select the environment, you created in earlier step e.g., gen-ai-app-dev-course
-
Click on Green button next to environment name
-
Select terminal from the list
- Change folder to [root-folder-for-course-repository]/gen-ai-app-dev/Setup/
-
Verify the folder by listing files in the directory. You MUST see the files requirements.txt, langchain-requirements.txt and huggingface-requirements.txt
-
Linux/Mac
ls
- Windows
dir
- Run the commands below:
conda config --append channels conda-forge

conda install -y --file requirements.txt

pip install  -r langchain-requirements.txt

pip install  -r huggingface-requirements.txt
4. Verify installation
-
Select the environment
-
Click on Green button next to environment name
-
Select Open with Jupyter Notebook from the list
-
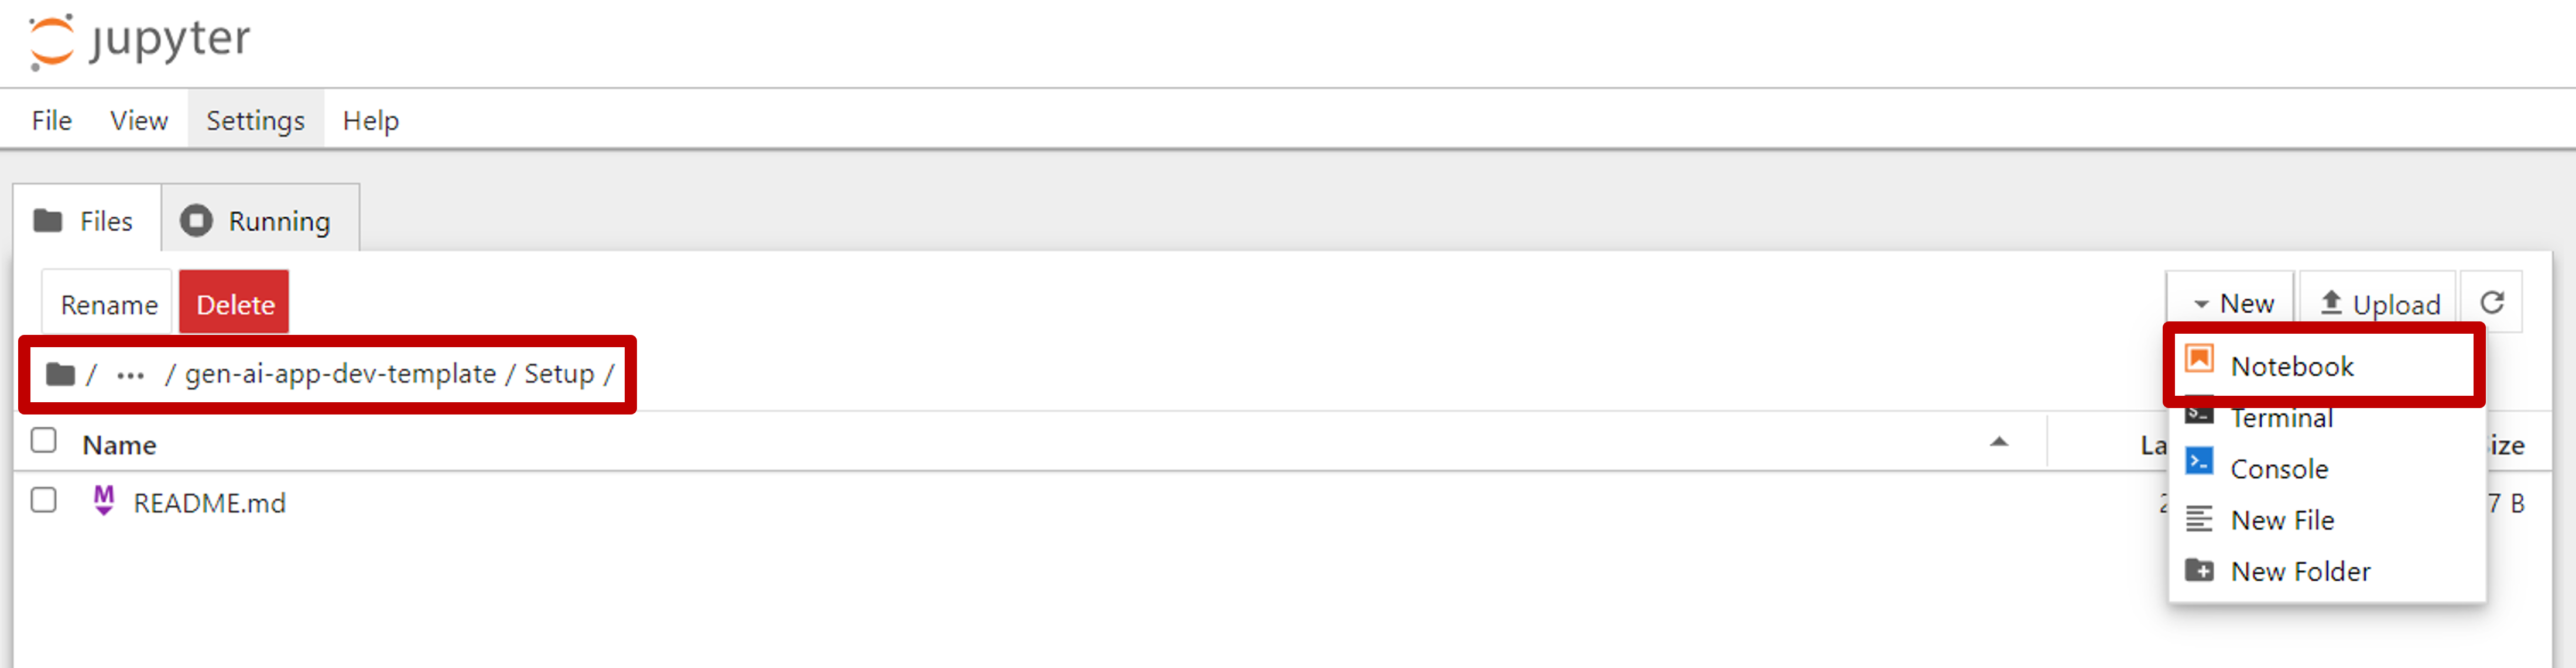
Change folder to [root-folder-for-course-repository]/gen-ai-app-dev-template/Setup/
-
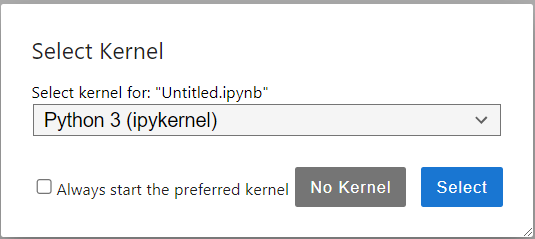
Create a new notebook with the name test-notebook
- Select Python 3 kernel
-
Re-name the notebook to test-notebook
-
Run the following commands to test
- Following command should show version Python 3.12.4
!python --version
!conda list